How to Turn on an LED
Parts List

Set up
The Raspberry Pi has many pinouts opposite its HDMI and power. These pinouts do many unique things, such as Serial, General Input Output, and power. Please look at the raspberry pi pinouts to ensure you connect to the right one.
We will be using the GPIO or (General Purpose Input Output) pins on the pi to turn off and on the LED. These pins are PWM or (pulse width modulation). This means we can vary a duty cycle. But we can also turn them on or off. Turning a pin on means drawing the output voltage high, and turning it off means drawing the output voltage low. This will come in handy later when turning on the LED.
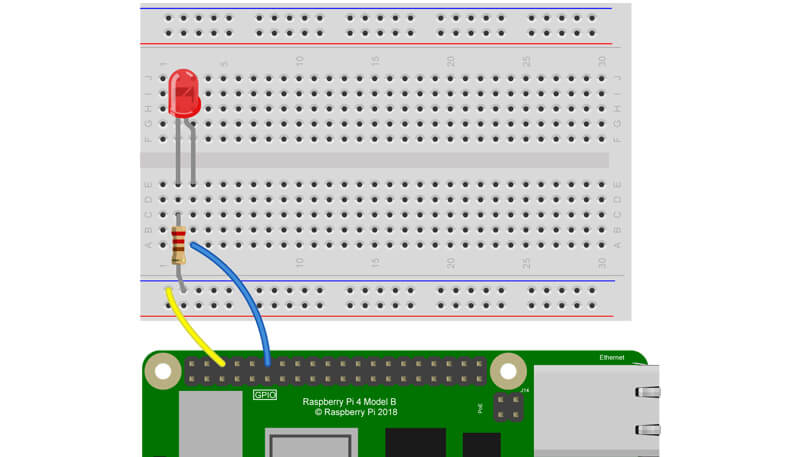
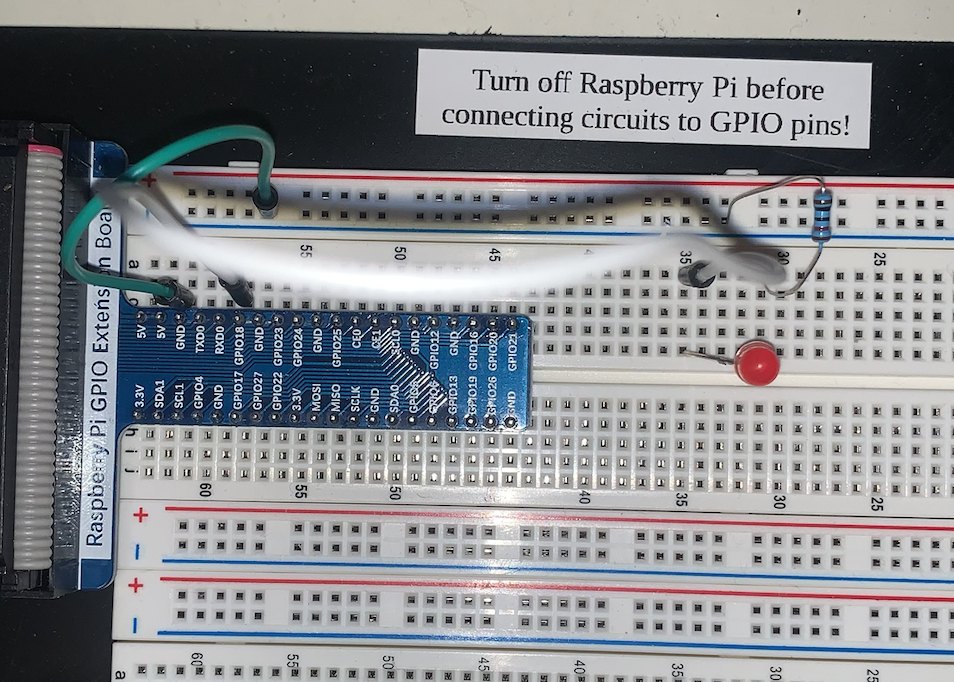
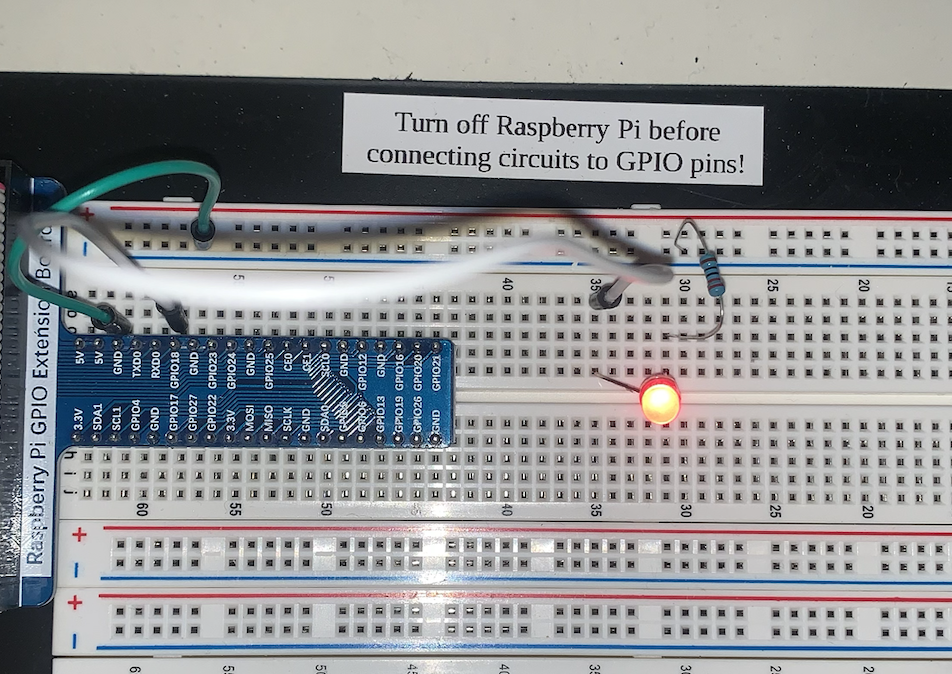
Start by attaching the LED’s anode(longer side) to pin 12 on the PI. This is GPIO 18.
Connect the LED’s cathode(shorter side) to a resistor.
Connect the other end of the resistor to the ground pin on the pi. This is pin 6 on the pi.

Software
The Raspberry Pi is capable of running a wide range of coding languages, providing versatility for various programming needs. When it comes to scripts like the one at hand, Python proves to be an excellent choice due to its seamless integration with the Pi’s IO functionalities, making access and control straightforward.
In Python, we can utilize the powerful RPi library, which encompasses comprehensive controls specifically designed for the Raspberry Pi. Notably, the GPIO (General Purpose Input Output) functionality within the RPi library will play a crucial role in our project. It enables us to interact with the Pi’s GPIO pins effectively, allowing us to easily interface with external devices and sensors.
Create a new File called LED.py.
Open a Python IDE, ANY IDE will work, but we recommend using the Geany IDE which should already be installed on the pi stations!
And paste the following code.
The Code
import RPi.GPIO as GPIO
import time
GPIO.setmode(GPIO.BCM)
GPIO.setwarnings(False)
GPIO.setup(18,GPIO.OUT)
print("LED on")
GPIO.output(18,GPIO.HIGH)
time.sleep(1)
print("LED off")
GPIO.output(18,GPIO.LOW)
Explanation:
Firstly, we import the necessary libraries, which give us access to the RPi input and output.
Second, we set up the GPIO and pin 18. this corresponds to pin 12 on the pi.
Then all we need to do is set the Pin to High to turn on the LED or Low to turn it off.


